Connectors, Connector Kits, and Wiring Pigtails

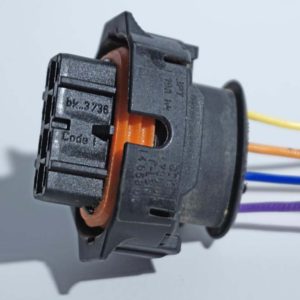
A very common question we receive relates to why the same connector is offered in multiple options and what those options mean.  Ballenger Motorsports will typically offer a connector in three varieties.

  1. Connector Housing Only. This product provides the customer with the plastic connector housing and any secondary locks the housing requires.  There are various reasons customers want to purchase the housing alone.
  2. Connector Kit.  A connector kit provides the connector housing with any secondary locks as well as terminals and seals for the customer to crimp directly onto their harness.  This does require some crimping skill and may require a crimp tool.  We offer crimping & stripping tooling here. We also provide a terminal crimp validation chart here.  You should check your work and validate your crimp quality!
  3. Connector Pigtail.  We perform the work of crimping & striping the wire and provide you with a connector housing with pre-assembled wire leads.  In some special cases, the wires may not be inserted in the housing but typically the pigtail comes fully assembled.  We recommend you use unsealed butt connectors and adhesive lined heatshrink when completing your weather sealed connection.  Our pigtails do not come with these items because of the wide variance in customer preference.

Part Identification Guide

We need high quality images shot in FOCUS with EXCELLENT lighting and the male blade width of a terminal to identify a connector.  Usually we want to see the harness side plug connector straight on, at an iso angle, and a side angle.

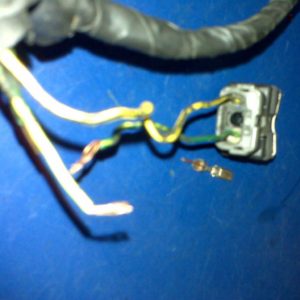
We get a LOT of out of focus images with poor lighting that don’t help us identify parts, delaying or halting identification.

We receive hundreds of requests to identify specific parts for automobiles, motorcycles, industrial applications and agricultural applications daily. While we do have expertise in identifying and sourcing parts for our customers, most of the requests we receive don’t have the information we need for identification and sourcing.

What information do we need?
1. How many pieces are you looking for? What is the estimated annual usage?
2. Do you need ancillary components like terminals, seals, etc?
3. How quickly do you need the part(s)?
4. What is the year, make, model, engine & transmission the part comes from.
5. What does the part do and/or what does it connect to?
6. What is the part number? If no part number, please mention any numbers on the part and any symbols (often manufacturer symbols).
7. Provide well lit, in focus images! Please see our photo submission guide here.
8. Scaling information. Is the part 1 cm or 1m in length? With terminals, what is the outer diameter of the circular terminal or blade width of the male terminal? What wire size and outer diameter do you plan to use?
9. Please use a descriptive title in the subject line of your email.

Due to the large volume or requests we receive, we are not able to answer every single request despite working extended hours to try and meet our customers needs. The higher the quality of the information you provide, the better able we are to deliver an expedient and helpful response.


good-customer-image

Example of a good image submission

bad-customer-image

Example of a bad image submission

Example of a bad image submission

Example of a bad customer image

Connector Photo Submission Guide

February 11th, 2010

We receive a very large number of images from customers trying to identify various parts. Often these are small parts and often they are terminals or connectors. Many of these images are out of focus and / or have poor lighting such that we have to ask for improved images. This is often frustrating for customers because the parts are often not easy to access and taking photographs of small items can be difficult without experience.

The quickest way to explain this issue is to say that yes, your inexpensive $100 point and shoot digital camera can take an excellent shot of a part for us to identify. It is not about how much you spend but rather about the technique. A good photographer can take amazing shots on a disposable camera.

Here are our basic steps to take a high quality image on a digital camera:

1. Focus – Set the camera to macro mode (often a flower button) setting.
2. Focus – If the camera won’t focus on the object but chooses objects nearby, change the camera focus setting to center point focus rather than averaged or automatic focus. Then place the part in the center of the field of view.
3. Focus – If you still have trouble after step #1 & 2, you are probably too close to the object. Move the camera away from the object 1 to 3 feet (0.3 to 0.9 m) and crop the image after the picture is downloaded.
4. Some cameras will bounce between chosen focus zones. Steps #1 – 3 above typically help but if they do not solve the problem, keep letting the camera choose zones until you get the desired one. Try different angles, distances, etc.
5. Lighting – Use LOTS of flood or ambient general lighting for your shot and use spot lighting on internal part features. A flashlight is a great tool in a confined space.

The important issues here are focus, focus, focus, focus and lighting. Please send images that are in focus and do not send images that are out of focus. This may seem obvious but we receive MANY images that are out of focus while requiring recognition of small detailed features that are difficult to discern even with a good image.

Terminal Crimp Validation Charts

December 18th, 2009

One of our most common customer questions centers around terminal crimp quality and validation. For this reason, we have decided to post a chart provided by Tyco Electronics in a few different formats.

For professional shops, we recommend downloading the highest quality and printing the guide on legal or larger paper for shop reference. For individuals, we have smaller versions available and you can simply reference the images or pdfs.

Large Crimp Validation Poster – PDF File Format – 2615 x 1396 – 3.5Mb
Large Crimp Validation Poster – PNG Image Format – 2615 x 1396 – 1Mb
Abbreviated Crimp Validation Poster – PDF File Format – 1064 x 1886 – 1.7Mb
Abbreviated Crimp Validation Poster – PNG Image Format – 1024 x 1815 – 0.5Mb